Let’s face it—getting your floors redone is expensive! If you have existing hardwood floors, hiring someone to sand and polyurethane them can cost upwards of $2000. To lay 500 square feet of vinyl flooring, you’re looking at spending anywhere from $1200-$1600 in materials and labor. However, painting your floors will only cost you roughly $200 in paint and a few hours of your time…
So, what do you do?
It’s simple, really:
Step 1: Prep
First things first: move all of the furniture out of the chosen room.
Step 2: Clean
Just like when you’re painting walls, you need, need, NEED to clean your floors before you lay paint over them! Otherwise, you’ll end up with weird looking lumps permanently stuck to your floors. If you try to remove a lump, you’ll end up with a “bald” spot. Not pretty.
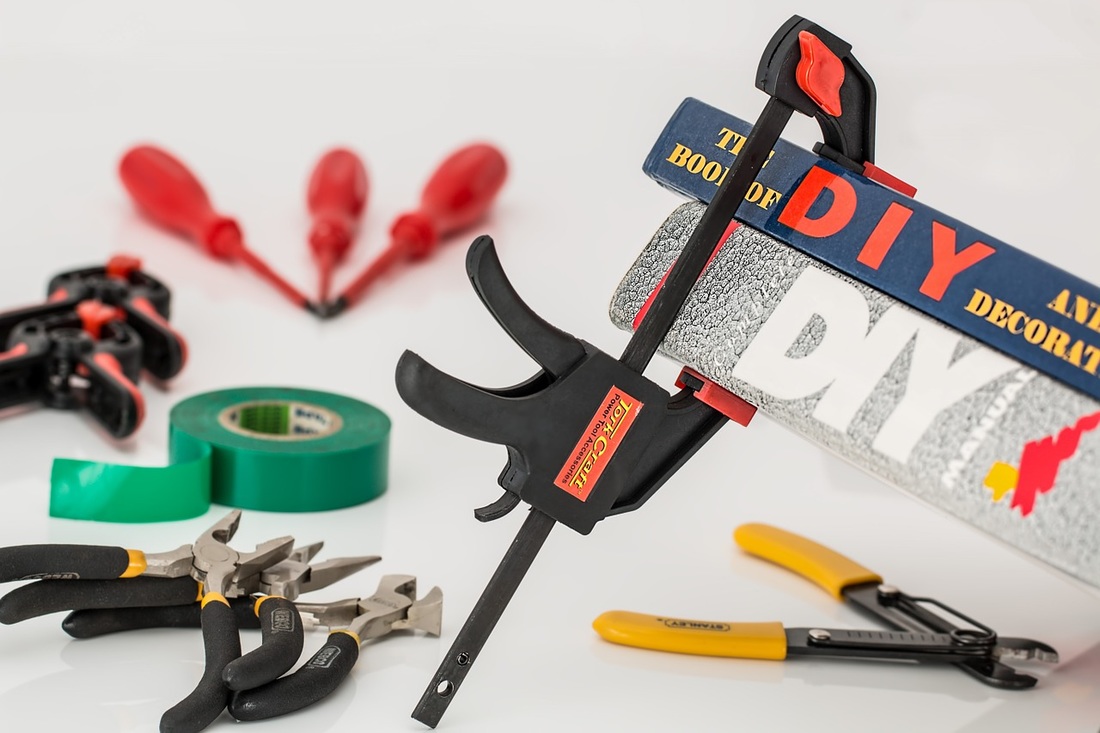
Step 3: Tape
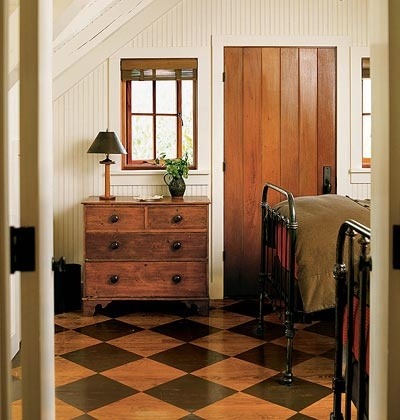
Tape off any baseboards and fixtures that you don’t want to get paint on. If you want to do a checkerboard design, or stripes, or some other fancy design, lay out the design with tape.
Step 4: Prime
If you want your painted floors to retain their “new” like feel for years to come, paint down a primer first. Use polyurethane based porch and floor enamel. Do not use paint made for walls, as this won’t withstand the scuffs and wear your floors are bound to go through.
Step 5: Start Painting
Your initial instinct might be to lay on one thick coat and call it a day, but trust me, this does not work. When painting your floors, you want to lay numerous thin coats of paint. This is going to be a tedious process, as you’ll need to allow at least 24 hours between coats, and we recommend painting at least 3 coats.
Apply the coats with a ¼ inch roller for best results. Like with walls, you’ll want to trim out the flooring before painting the center.
Step 6: Time to Dry
Though we always recommend painting in a dry climate (as humidity tends to cause bubbling and peeling), it’s especially important to keep the environment dry when you’re panting your floors. To ensure the quickest dry time, keep the heat on (if necessary), and the room at a comfortable 70 degrees F.
Some Tips to Consider Before Painting Your Floors
1. We recommend leaving the house directly after painting, as the fumes are strong with floor paints. If the weather is nice, leave the windows up while you’re out.
2. Paint one or two rooms at a time, that way you’re not forced to stay overnight somewhere else while your floors dry.
3. Avoid painting in humid or wet conditions. Doing so really will make the project much more difficult, and chances are, you’ll be forced to redo the whole area.
Some of Our Favorite DIY Painted Floor Projects
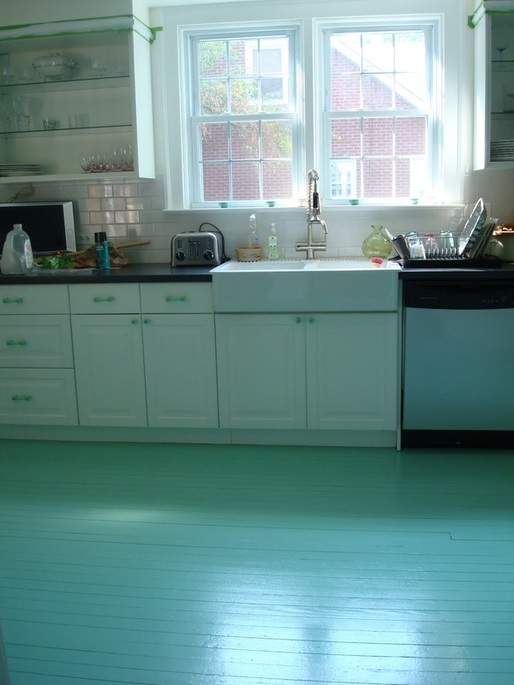
1. The Teal Deal: http://blog.effortless-style.com/2010/08/diy-painted-kitchen-floor-for-50/?crlt.pid=camp.GyXHWQgC
So, what do you do?
It’s simple, really:
Step 1: Prep
First things first: move all of the furniture out of the chosen room.
Step 2: Clean
Just like when you’re painting walls, you need, need, NEED to clean your floors before you lay paint over them! Otherwise, you’ll end up with weird looking lumps permanently stuck to your floors. If you try to remove a lump, you’ll end up with a “bald” spot. Not pretty.
Step 3: Tape
Tape off any baseboards and fixtures that you don’t want to get paint on. If you want to do a checkerboard design, or stripes, or some other fancy design, lay out the design with tape.
Step 4: Prime
If you want your painted floors to retain their “new” like feel for years to come, paint down a primer first. Use polyurethane based porch and floor enamel. Do not use paint made for walls, as this won’t withstand the scuffs and wear your floors are bound to go through.
Step 5: Start Painting
Your initial instinct might be to lay on one thick coat and call it a day, but trust me, this does not work. When painting your floors, you want to lay numerous thin coats of paint. This is going to be a tedious process, as you’ll need to allow at least 24 hours between coats, and we recommend painting at least 3 coats.
Apply the coats with a ¼ inch roller for best results. Like with walls, you’ll want to trim out the flooring before painting the center.
Step 6: Time to Dry
Though we always recommend painting in a dry climate (as humidity tends to cause bubbling and peeling), it’s especially important to keep the environment dry when you’re panting your floors. To ensure the quickest dry time, keep the heat on (if necessary), and the room at a comfortable 70 degrees F.
Some Tips to Consider Before Painting Your Floors
1. We recommend leaving the house directly after painting, as the fumes are strong with floor paints. If the weather is nice, leave the windows up while you’re out.
2. Paint one or two rooms at a time, that way you’re not forced to stay overnight somewhere else while your floors dry.
3. Avoid painting in humid or wet conditions. Doing so really will make the project much more difficult, and chances are, you’ll be forced to redo the whole area.
Some of Our Favorite DIY Painted Floor Projects
1. The Teal Deal: http://blog.effortless-style.com/2010/08/diy-painted-kitchen-floor-for-50/?crlt.pid=camp.GyXHWQgC
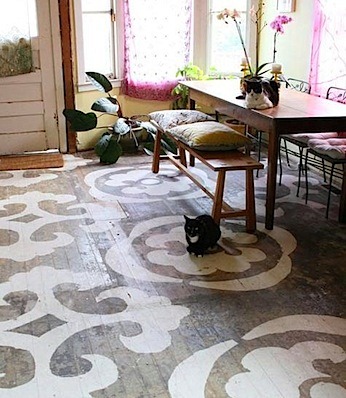
2. Rustic Elegance: http://blog.effortless-style.com/2010/08/diy-painted-kitchen-floor-for-50/?crlt.pid=camp.GyXHWQgC


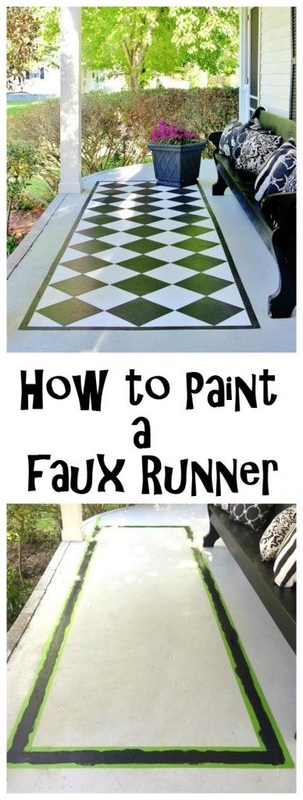
5. The Runner: http://www.thistlewoodfarms.com/faux-painted-floor-runner
Don’t want to tackle this project on your own? At Liberty Paint & Construction, LLC, we enjoy painting floors (after all, it is a nice change-up from painting walls!), and we’ll still cost you less than paying to have entirely new floors installed. Plus, painting your floors adds more character and charm to a space than anything else can.
Give us a call at 619-770-9437, or email us at [email protected] to get your FREE QUOTE today!
Give us a call at 619-770-9437, or email us at [email protected] to get your FREE QUOTE today!
 RSS Feed
