You would be surprised by how many clients ask us why their doors turned out so splotchy, or streaky, or why there were so many runs, when they tried to paint them themselves. After all, it should be easy to paint a door, right? You take a roller, a can of paint and just roll a couple of coats on, right?
If you’re painting your doors with a roller and a couple of coats of paint, you’re doing it wrong. And you’re going to end up with splotchy, streaky and runny doors.
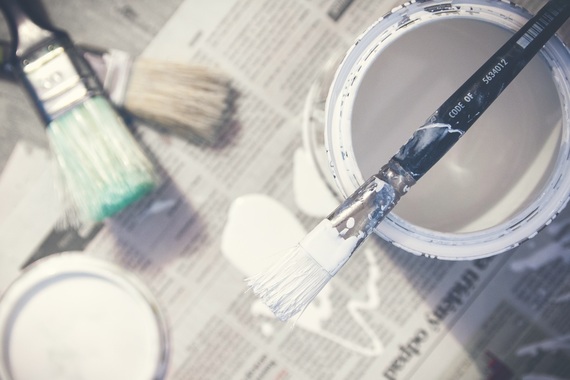
Luckily for you, we’ve painted a lot of doors in our day, and we know the perfect way to paint them, without any streaks or runs.
This painting tutorial is for people with paneled doors, the most difficult kind to paint.
Step 1: First, remove the door and all its hardware. Lay it flat, either on the ground, or atop of two saw horses (preferably across saw horses, but we’ve laid them on the ground on several occasions). Laying them flat will ensure there are no drips, but if you have faith in your brushing and rolling abilities, you can keep the door on the hinges; it’s completely up to you!
Step 2: Next, it’s time to sand the doors. You don’t want to skip this step, as most doors have some type of varnish or finish on them that new paint will refuse to adhere to. You don’t have to bust out the electric sander for this – a sheet of sandpaper or a block will do the job just fine!
Step 3: Prime. If you’re wondering whether or not you really need to prime, here are some questions to ask yourself:
If you answered yes to any of the above questions, then yes, you need to prime.
Step 4: Paint the panels first, using a smaller roller on the actual panels, and a brush in the grooves.
Drag your brush in the same direction as the wood grain on your door, as this will highlight the grain and keep your door looking neat and clean in the future. Never run your brush against the grain, as this will always result in an unprofessional finished look.
Step 5: Next, roll the vertical center of the door, going with the grain.
Step 6: Once the vertical center is rolled, roll between the panels horizontally. Even as you roll across the vertical center you already painted, continue to roll horizontally at this phase.
Step 7: Paint the border of the panels.
Step 8: Roll the edges of the door. Be sure to avoid the hinges, as painted hinges isn’t very professional either! To smooth out the paint, use your paintbrush.
Step 9: Let your door dry for 30 minutes to an hour, then repeat. When you’re done with the second coat of paint, let dry for at least 2 hours, then flip them over and paint the other side.
For all of your paint and remodeling needs, contact Liberty Paint & Construction, LLC to schedule your FREE ESTIMATE today!
If you’re painting your doors with a roller and a couple of coats of paint, you’re doing it wrong. And you’re going to end up with splotchy, streaky and runny doors.
Luckily for you, we’ve painted a lot of doors in our day, and we know the perfect way to paint them, without any streaks or runs.
This painting tutorial is for people with paneled doors, the most difficult kind to paint.
Step 1: First, remove the door and all its hardware. Lay it flat, either on the ground, or atop of two saw horses (preferably across saw horses, but we’ve laid them on the ground on several occasions). Laying them flat will ensure there are no drips, but if you have faith in your brushing and rolling abilities, you can keep the door on the hinges; it’s completely up to you!
Step 2: Next, it’s time to sand the doors. You don’t want to skip this step, as most doors have some type of varnish or finish on them that new paint will refuse to adhere to. You don’t have to bust out the electric sander for this – a sheet of sandpaper or a block will do the job just fine!
Step 3: Prime. If you’re wondering whether or not you really need to prime, here are some questions to ask yourself:
- Is the door bare or stained wood?
- Is the door dark in color, and you want to paint it a much lighter color?
- Is the door currently painted in an oil based paint, and you want to cover it with a latex based paint?
If you answered yes to any of the above questions, then yes, you need to prime.
Step 4: Paint the panels first, using a smaller roller on the actual panels, and a brush in the grooves.
Drag your brush in the same direction as the wood grain on your door, as this will highlight the grain and keep your door looking neat and clean in the future. Never run your brush against the grain, as this will always result in an unprofessional finished look.
Step 5: Next, roll the vertical center of the door, going with the grain.
Step 6: Once the vertical center is rolled, roll between the panels horizontally. Even as you roll across the vertical center you already painted, continue to roll horizontally at this phase.
Step 7: Paint the border of the panels.
Step 8: Roll the edges of the door. Be sure to avoid the hinges, as painted hinges isn’t very professional either! To smooth out the paint, use your paintbrush.
Step 9: Let your door dry for 30 minutes to an hour, then repeat. When you’re done with the second coat of paint, let dry for at least 2 hours, then flip them over and paint the other side.
For all of your paint and remodeling needs, contact Liberty Paint & Construction, LLC to schedule your FREE ESTIMATE today!
 RSS Feed
